Share
1. Start With Quality Lumber and Understand Wood Types

Choosing the right wood sets the foundation for every project. Hardwoods like oak, maple, and cherry are durable and beautifully grained—ideal for furniture making—but costlier and harder to work with. Softwoods such as pine and cedar are more forgiving, budget‑friendly, and great for outdoor projects given their natural resistance to rot. When selecting boards, look for straight grain, minimal knots, and consistent color. Check for warping by sighting down the length, and weigh each board—sustainably sourced, kiln‑dried lumber is less likely to twist or crack after cutting. Learning wood density and moisture content is vital too; high moisture can cause boards to shift after assembly. For your first projects, use kiln‑dried pine or poplar—they’re easy to cut, sand, and glue. As your confidence grows, move on to hardwoods. Remember: a beautiful finish starts with good lumber. Buying better wood often saves time and money in the long run, leading to sturdier, longer‑lasting results.
2. Master Accurate Measuring and Marking

“Measure twice, cut once” isn’t just said—it’s sacred. Invest in a reliable tape measure with bold, vernier graduations or a stainless steel ruler and square. Use a sharp pencil or marking knife to ensure clean, precise lines. When marking, always lock the tape measure firmly and double‑check zero alignment, especially when transferring measurements across boards. For repeat cuts, use stop blocks on your saw fence. Mark board ends with orientation labels (“front,” “edge,” “left”) to avoid mix‑ups. Employ precision tools like combination squares for 90° and 45° edges, and bevel gauges for angles. A marking jig helps draw parallel lines for uniform joinery. Avoid “eyeballing”—even slight discrepancies can derail assembly. Before cutting, list critical dimension checkpoints systematically on scrap wood to test your setup. Precise marking minimizes error, tightens joints, and makes sanding and finishing faster. It’s a skill every beginner must build, laying the groundwork for precise, professional‑looking pieces.
3. Understand and Practice Safe Tool Use

Woodworking is rewarding, but power tools demand respect. Always read the manual first. Wear eye protection, hearing defense, and avoid loose clothing or jewelry that can get caught. Keep push sticks, featherboards, and riving knives in place on table saws to guide wood and protect from kickback. Never reach across a spinning blade—use a push block instead. Ensure sharp blades and bits; dull edges cause tear‑out and binding. For mitre and circular saws, clamp down your workpiece securely. When using routers, move from left to right for outside cuts and right to left for inside ones. Drill press users should clamp the wood and select the correct speed for the bit size. Clean workspace and adequate lighting are essential. Disconnect power before changing blades or servicing. Most injuries happen due to fatigue or rushing—take breaks, stay focused, and breathe. Developing safe habits early prevents accidents and builds confidence to tackle bigger projects.
4. Use Proper Joint Techniques for Durability

Joining wood securely ensures projects last. While nails and screws hold pieces, proper woodworking joints—like mortise and tenon, dovetail, box, and biscuit—create stronger, more refined results. Beginners should start with easier alternatives: pocket‑hole or biscuit joints combine mechanical fasteners with glue for quick, reliable connections. For a pocket‑hole jig, drill angled holes and use specialized screws to connect boards—great for cabinetry. Biscuit joiners slice slots for thin wood “biscuits” that expand when glued, reinforcing alignment. Once comfortable, progress to dado and rabbet joints using a table saw or router table for shelves and cabinetry. Mortise and tenon, while more advanced, yield exceptional strength—great for chair frames and tables. Practice these joint cuts on scrap wood to learn fit and tightness. Well‑executed joints make sanding, clamping, and finishing smoother and give your project structural integrity that lasts decades.
5. Sand Progressively for a Smooth Finish
Sandpaper transforms rough lumber into silky surfaces. But rushing this step can ruin visible appearance. Begin with coarser grits: 80 or 100 removes mill marks and flatten boards. Progress to 120–150 to smooth scratches, then fine 180–220 for prepping a finish‑ready surface. Always sand along the grain to avoid cross‑grain marks. Use an orbital sander for flat areas and hand‑sand edges and curves. Keep sandpaper clean—clogging reduces effectiveness. Use a sanding sealer or pre‑finish wood conditioner before oil or stain to reduce blotching on softwoods. After each grit, clean dust with a bristled brush, tack cloth, or vacuum. Allow wood to dry if using a pre‑stain conditioner, then lightly re‑sand with 220 grit. Proper sanding deepens wood grain and improves finish absorption, resulting in a professional‑grade surface you’ll feel as well as see.
6. Choose the Right Finishes for Impact
A great finish enhances beauty and protects wood. Basic options include oils, varnishes, lacquers, and water‑based topcoats. Each brings a different level of sheen, durability, and maintenance. Tung or Danish oil penetrates deeply, enhancing grain and giving a warm tone, but may need occasional re‑application. Polyurethane forms a hard surface—ideal for tabletops and floors. Water‑based polyurethane dries clear, while oil‑based gives an amber glow. Spray lacquers offer quick coverage and ultra‑smooth finish, but require careful application and a well‑ventilated space. Consider moisture resistance for items used in kitchens or bathrooms—epoxy resin coatings provide full protection. Always apply in thin, even coats, sanding lightly between layers with 320 grit. Test finishes on scrap of the same wood to confirm color and sheen. With the right finish, your project not only looks stunning, but stands up to everyday wear.
7. Maintain Sharp Tools for Quality Cuts
Sharpening is essential—dull tools lead to tear‑out, burn marks, and unsafe operation. Keep plane irons, chisels, and scraper blades razor‑sharp using whetstones or sharpening systems with guides. Power tool blades and bits should be inspected before each use and replaced or sharpened when dull. You can use diamond or carbide stones, oil stones, or ceramic stones depending on the metal type. For saw blades, rotary or triangular files work well; specialist blade services can re‑sharpen harder blades. Sharpening should take only a few minutes but offers massive returns: cleaner cuts, less sanding, and reduced risk of accidents. It’s a habit that separates hobbyists from craftsmen. Invest time in sharpening and your projects will flow more smoothly.
8. Stay Organized—Shop Layout Matters
An efficient workshop boosts productivity and makes starting easy. Arrange your space to minimize repetitive movement. Place frequently used tools—saws, router, sander—in a central area with enough room to feed wood in straight lines. Dedicate storage zones for hand tools, hardware, and fasteners. Use pegboards, magnetic strips, and labeled bins to keep tools visible and accessible. Keep assembly tables and clamps in a clear zone—nothing slows you more than jumping over wood piles to clamp. Add proper lighting in discerning spots: above workbenches and around cutting tools. Maintain dust collection to reduce airborne particles and clutter—portable cyclone systems and shop‑vacuum combos are great for beginners. A clean, organized shop retains tool health and inspires consistent work. It also prevents misplacing tools and losing minutes hunting for that one square.
9. Practice Test Cuts and Dry Assemblies
Before committing to final assembly, perform test cuts and dry‑fit all parts. Use offcuts to verify blade height, fence distance, bevel angles, and drill‑bit depth. Dry assembly checks for alignment, fit, and gaps, allowing you to tighten or shim before glue-up. For corners, use squares to check 90° angles. For curved parts, mock‑up with tape or clamps. This practice avoids costly mistakes once glue is applied, since many adhesives bond fast and very strongly. With dry runs, you spot mis‑cuts, confirm tolerances, and refine clamping strategies. It also gives practice opportunities for tasks like edge banding or routing grooves. Think of each test as a rehearsal: the real performance runs more smoothly and confidently.
10. Keep Learning and Embrace Mistakes
Woodworking is an art and a journey. Each project teaches new lessons—sometimes through successes, often through errors. Embrace mistakes as your best teachers. When a corner doesn’t close right or stain looks blotchy, investigate why: wood grain, glue squeeze‑out, or finishing method? Online communities, YouTube tutorials, books, and local guilds offer a wealth of knowledge. Document your projects and mistakes—what went well, what didn’t, and what you’ll do next time. Take small workshops, visit woodworking shows, and ask seasoned woodworkers for feedback—most love sharing tips. Over time, your skills will deepen, and your projects will reflect your growing vision. Patience, practice, and curiosity are your greatest tools—beyond chisels or saws.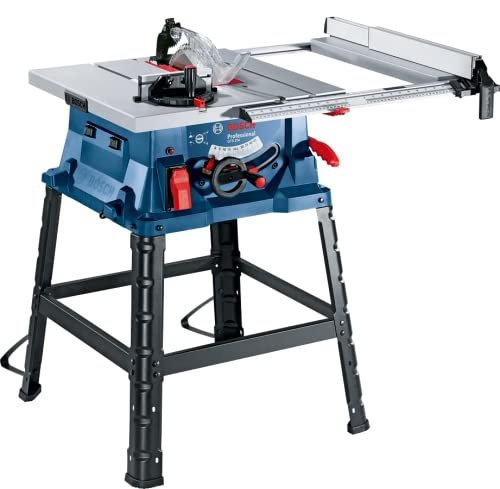

A ZEPHYR EFFECTS INITIATIVE


