DIY Torched Wood Countertop – A Rustic Masterpiece You Can Build at Home
Share
If you’re looking to add a stunning, rustic centerpiece to your home without breaking the bank, building a torched wood countertop using the Shou Sugi Ban technique might be your perfect weekend project. This traditional Japanese method of wood preservation doesn’t just elevate the aesthetic value of your furniture—it also strengthens the wood and makes it more durable. Whether it’s for your kitchen, bar area, or laundry room, this project combines art, craftsmanship, and functionality.
Let’s dive into the journey of creating a custom wood countertop using basic tools, some patience, and a touch of fire!
What Is Shou Sugi Ban?
Shou Sugi Ban, also known as Yakisugi, is a centuries-old Japanese method of preserving wood by charring its surface. The process creates a unique, dramatic texture and grain pattern that gives the wood an elegant, rustic look. But it’s not just for beauty—it also adds durability, water resistance, and even fire resistance.
This method is traditionally used in exterior siding but has gained popularity in interior design, especially in countertops, accent walls, and furniture.
 Materials and Tools You’ll Need
Before you begin, gather the necessary supplies. Here’s what you’ll need for this project:
Pine or other softwood boards (in your desired size)
Plywood backing for support
Pocket-hole jig and screws
Wood glue
Bar clamps
Propane torch (and fuel)
Sandpaper (80 to 120 grit)
Stain (optional, depending on your color preference)
Oil-based polyurethane (for finishing)
Brush or cloth (for stain and sealant)
Safety gear (gloves, goggles, respirator mask)
Fire extinguisher (essential when using a torch!)
Step 1: Preparing the Wood Slab
Start by measuring and cutting your wood boards to size. It’s best to use the old carpenter’s rule—measure twice, cut once. Once cut, arrange the boards side by side to create the countertop surface.
Using a pocket-hole jig, drill angled holes into the edges of each board. Apply wood glue between the joints, then clamp the boards together and screw them tight. This creates a solid, seamless slab.
If you’re attaching the countertop to cabinets, secure the finished piece to a plywood backing for extra strength.
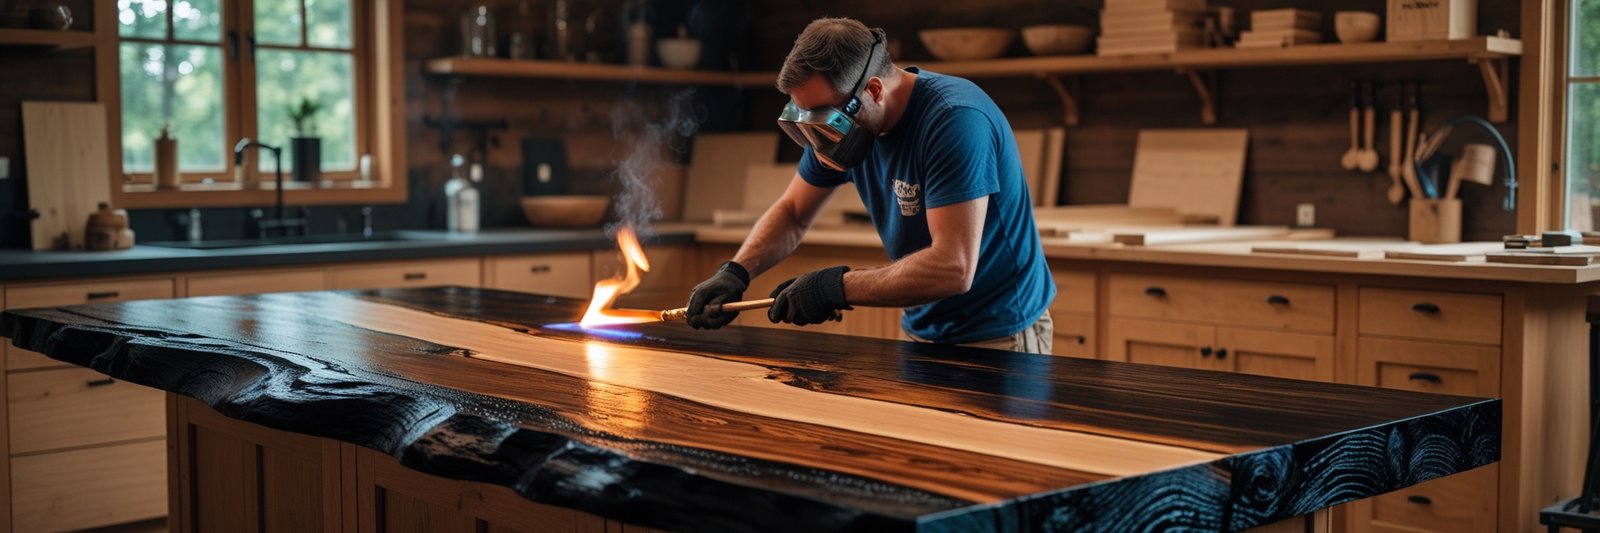
Step 2: Torch the Surface
Take your slab outdoors or to a well-ventilated area. Use a propane torch to char the surface of the wood. Move the flame evenly over the boards in sweeping motions to avoid scorching one spot too deeply.
Focus on bringing out the wood grain, especially knots or distinct textures. Practice on a scrap piece first to get a feel for how the wood reacts to the torch.
You’re looking for a deep, consistent burn that highlights the natural pattern of the wood without turning it into charcoal.
Step 3: Sanding and Staining
Once the slab has cooled completely, begin sanding. Start with an 80-grit paper to remove the loose char, then follow with 120-grit for a smoother finish. Be careful not to over-sand—you want to retain the contrast between the charred and lighter areas.
At this stage, you can choose to apply a wood stain to enhance the depth of color. A dark walnut or espresso stain works beautifully with torched wood. Apply evenly with a cloth, let it sit for a few minutes, and then wipe off the excess.
️ Step 4: Sealing the Countertop
For protection and a long-lasting finish, apply three coats of oil-based polyurethane. Use a brush or cloth to apply the first coat, let it dry thoroughly, then sand lightly before adding the next. Repeat until you’ve built up a durable, glossy finish. Skip sanding after the final coat.
Let the sealed slab cure fully before installing—it’s worth the wait to ensure durability.
Step 5: Installation
Once your slab is dry and cured, attach it to the plywood backing (if you haven’t already), and secure it onto your base cabinets using brackets or screws. Take time to align everything properly, and you’re done!
Stand back and admire your creation—a beautifully rustic, fire-touched countertop that brings warmth and character to any room.
❤️ Why We Love This Project
Budget-Friendly:
A DIY torched wood countertop costs a fraction of what you’d pay in stores.
Custom Look: No two pieces are alike. The Shou Sugi Ban technique ensures a one-of-a-kind surface.
Satisfying Craftsmanship: There’s something deeply rewarding about creating a functional piece of art with your own hands.
Final Thoughts
Don’t be afraid to embrace imperfections in the wood—that’s where the charm lives. The beauty of Shou Sugi Ban lies in its unpredictability and natural elegance. Whether you’re a seasoned DIYer or a total beginner, this project is approachable, exciting, and incredibly rewarding.
So grab your torch, put on some gloves, and let your creativity (safely) catch fire.
Have you tried Shou Sugi Ban? Share your DIY projects and experiences in the comments or tag us on Instagram. Let’s inspire each other to build something bold and beautiful!

A ZEPHYR EFFECTS INITIATIVE


